Guide to Setting up LS-PrePost
At first glance, LS-DYNA’s dedicated pre and post-processor, LS-PrePost, may seem a bit overwhelming with its three sets of toolbars and numerous available versions. However, a few simple steps can simplify the learning process. First, LS-PrePost is free and can be downloaded here, where you can choose from versions ranging from v4.1 to v4.6. It’s advisable to select at least version 4.3 and give it a try. If you experience any crashes or unusual behavior, consider trying a different version. I’m currently using v4.3.19 and have found it quite stable. I’ve also tested v4.6, which offers significant improvements in loading and rendering speeds for large models.
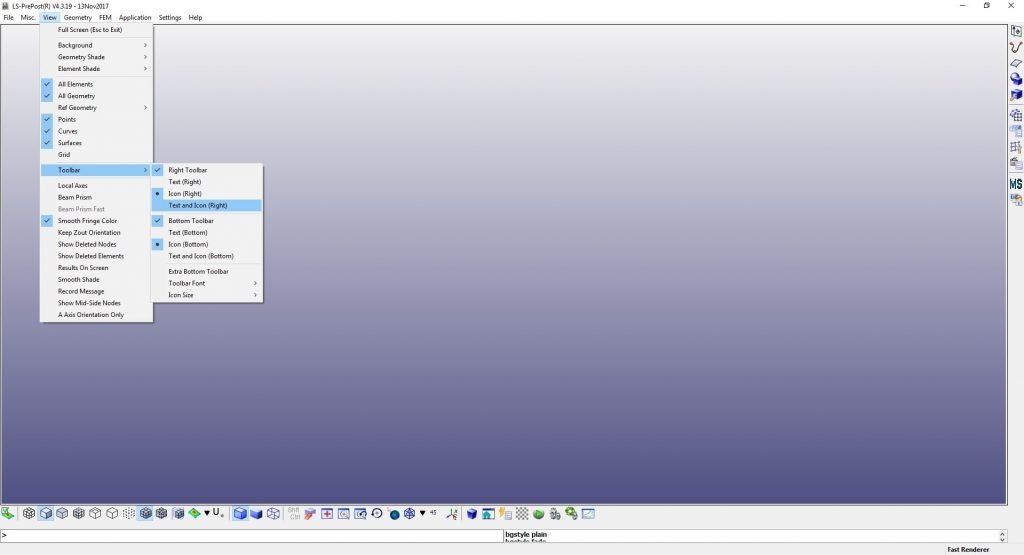
When you first open LS-PrePost, the first step is to go to the top toolbar and select View – Toolbar. Click on both “Text and Icon (Right)” and “Text and Icon (Bottom).” This will display descriptions below each icon on the right and bottom toolbars, making navigation much easier. Additionally, I recommend changing the background to white. To do this, go to the top toolbar and select View – Background – Settings. Choose the Plain option at the top, then check the box next to Background to select your desired color. Your new window should look something like this:
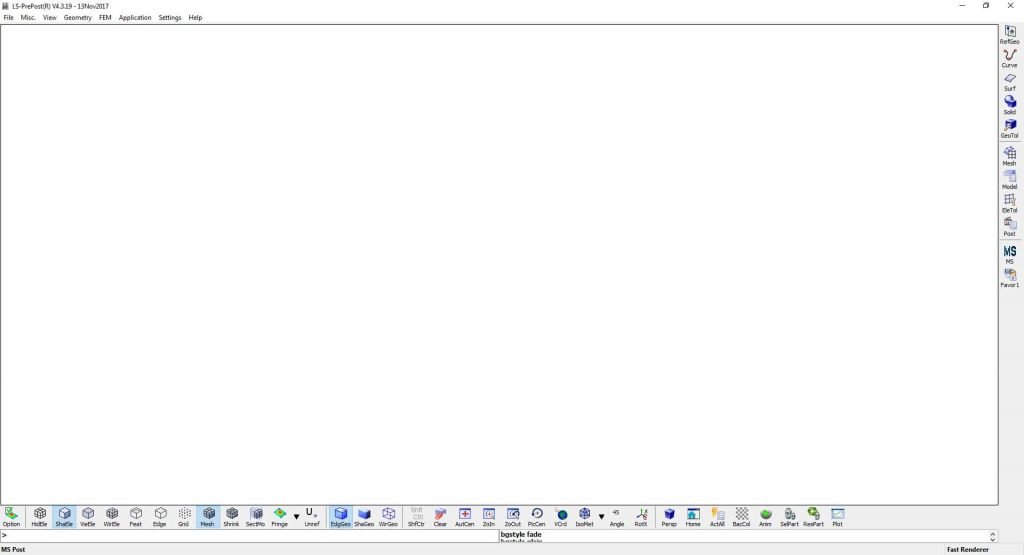
Navigating LS-PrePost
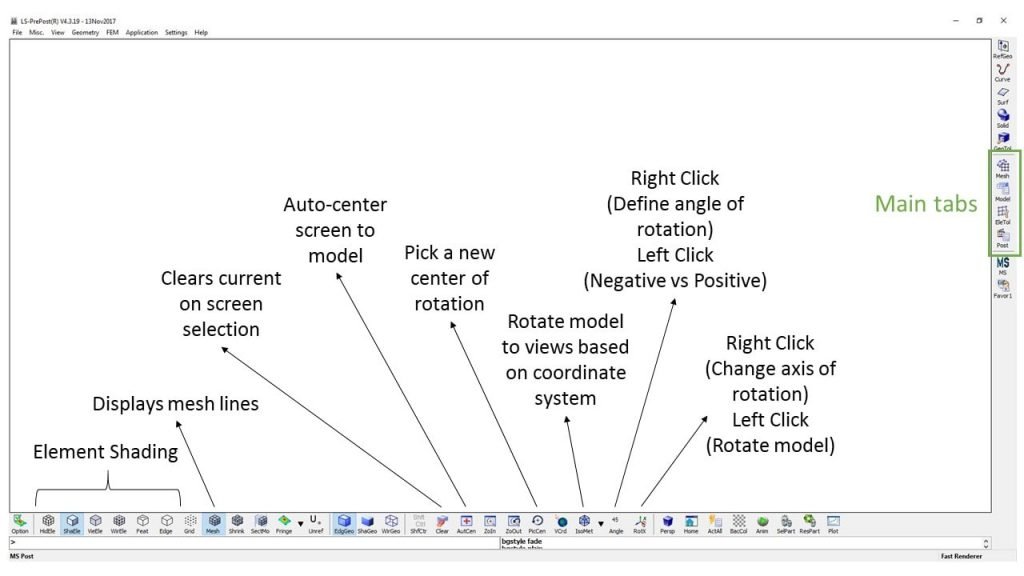
Now that we have LS-PrePost set up, it’s time to learn how to use it. I’ll start with the controls for manipulating your model: use shift + left click to rotate, shift + middle click to pan, and shift + right click to zoom. By replacing shift with control, you can view the model in wireframe mode, which is helpful for minimizing lag when working with large models.
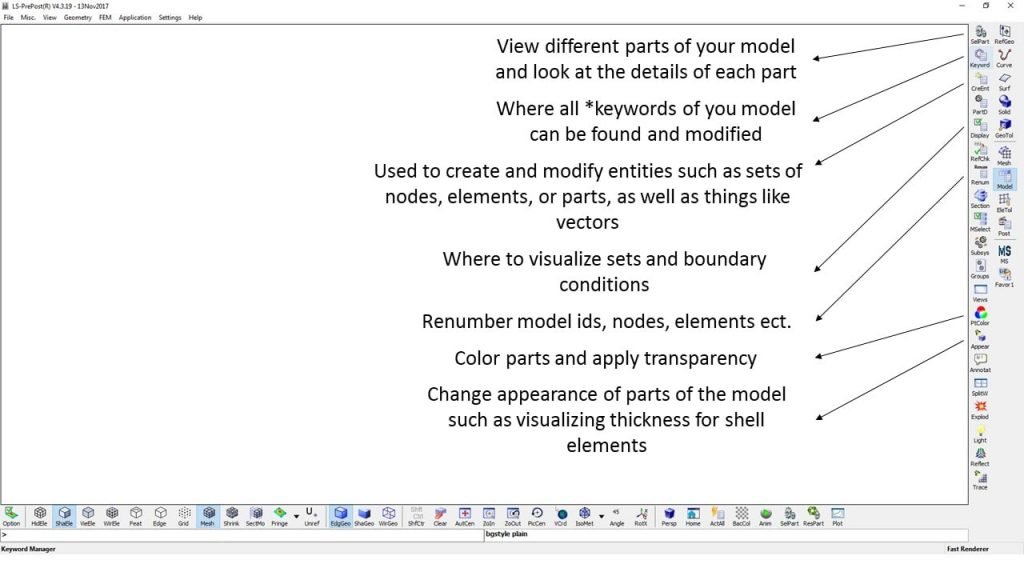
The bottom toolbar is primarily used for visualizing the model on screen, offering features like auto-centering, rotating, and displaying mesh lines. The right toolbar contains a series of master tabs that expand into smaller tabs when selected, with the main ones being mesh, model, element tool, and post.
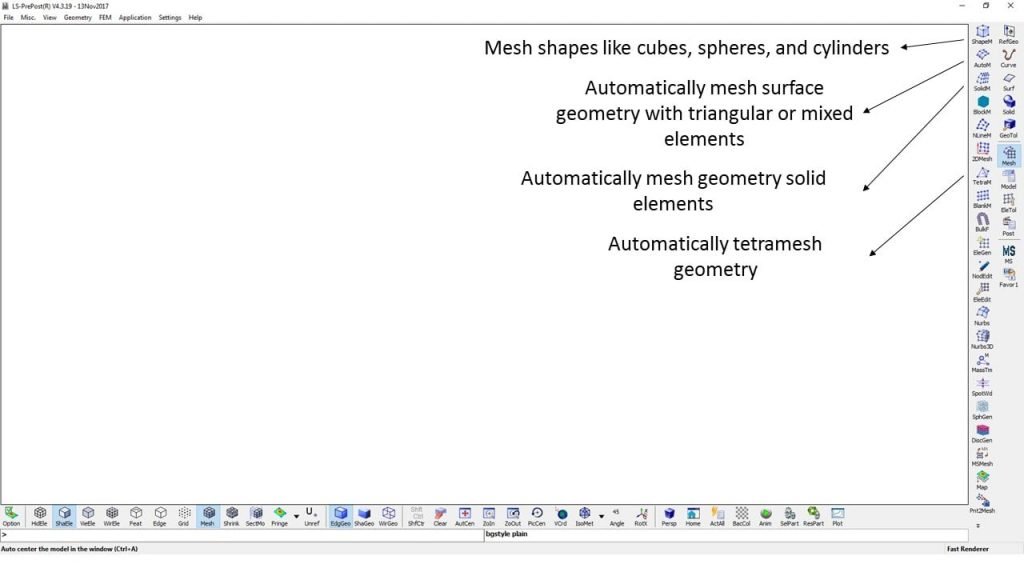
The Mesh tab allows you to perform basic meshing functions. While LS-PrePost may not be my first choice for meshing software, it is still functional as a shape mesher for creating elements like walls and impactors.
The Model tab is arguably the most important in LS-PrePost. This is where the details of the model can be viewed and manipulated. LS-DYNA utilizes a keyword-based formatting system, where each *Keyword is followed by a series of values specific to that keyword. For example, the *Node keyword is followed by a node ID value and three coordinates representing the x, y, and z location of that node in space. These details are different for each keyword. For instance, an *Element keyword includes an element ID, the part ID the element is assigned to, and the node IDs that define the element. It’s important to note that values for each *Keyword can be delimited by commas or 10 spaces. This keyword system can be reviewed by opening a .k file in a text editor. The Keyword tab in LS-PrePost reads the model details and presents them in an easy-to-navigate, tiered list, helping you check that your .k files are correctly formatted. Any changes made in the Keyword tab can be saved by selecting File > Save > Save Keyword. Note that this will overwrite your current model, but you can save it as a new model by using the Save As function instead.
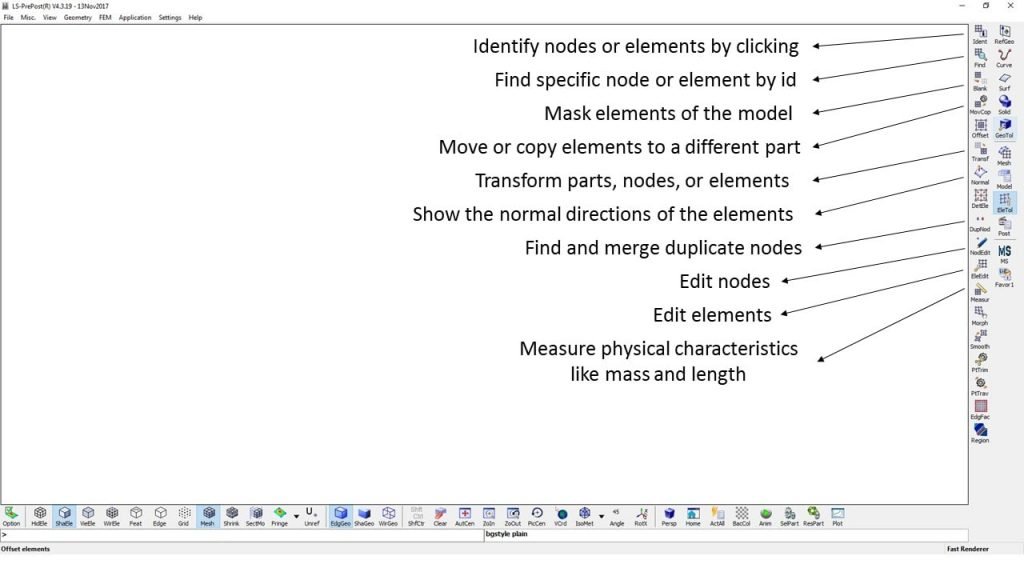
The Element Tool tab allows you to perform various tasks, such as identifying and locating nodes and elements, masking parts of the model, and using transformation functions to move your model in space. You’ll also find options to add or delete elements and measure physical characteristics of your model, such as mass, moment of inertia, and length.
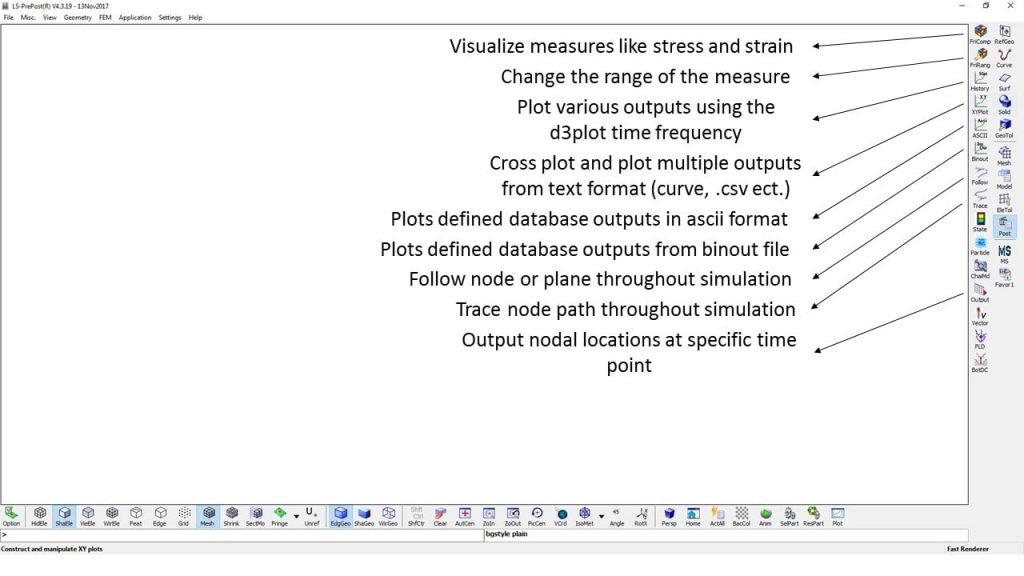
The Post tab (Post-Processor) is where you’ll work with simulation output files, like a finished simulation animation (.d3plot). This tab enables you to retrieve data from a simulation, visualize stress and strain as heat maps, plot trajectories and forces, track a specific point in space, and output nodal locations at any time point. Remember to set up your model with the appropriate *Database options to ensure you have the desired outputs.
LS-PrePost serves as a valuable Pre- and Post-processor for LS-DYNA. Hopefully, this introductory guide helps new users learn to navigate and use this software effectively to create better finite element models.
Have a question or comment? Join the discussion here.
